
Boating Lessons Learned: A Sharp Knife. I am embarrassed to admit it but I have never been able to sharpen a knife. It was so bad that when I bought a new knife I would hesitate cutting anything knowing that once I lost that sharp edge I would never get it back. Sad Huh? Well this week I experienced another Boating Lessons Learned and now I can do a passable job at restoring a sharp edge. Bottom Line Up Front:
– I bought an inexpensive stone at Home Depot that is large and has a course grit on one side and medium grit on the other. I also bought some 2000 grit sand paper in the auto department at Walmart.
– I blackened the edge with a permanent marker so I could see where I was honing. This allowed me to adjust my hold and stroke as necessary. This intel was HUGE!
– Safety First. I stroked the knife backwards dragging the blade with the edge trailing so I was less likely to slip and slice a body part with the edge. As with all boating tasks there is an element of risk. If you are not willing to be totally responsible and be held fully accountable for the outcome then turn to a professional and pay them to take on that responsibility for you.
– I soaked the stone in water for a few minutes then dipped it in water now and again to free up clean abrasive.
– I disregarded the existing blade angle, held the knife at an angle that felt natural to me, and I honed away with the course stone till I replaced the entire old edge with my new edge angle.
– Once I was sure the edge was as sharp as the course stone would take it I moved to the medium grit and repeated the process. I finished it off by doing the a same with the 2000 grit sand paper laid flat on a board.
All of the instructions I have ever read said something to the effect that I should hold the knife at a 25 degree angle to the stone and alternately hone back and forth 10 or so stokes on each side and WALLA the blade is sharp. Hum, 25 degrees you say? Recon how I am supposed to know what 25 degrees looks like? Alternately the instructions have said to hold the blade at the existing blade edge angle. Even with my best reading glasses on I could not tell what angle my existing edge was nor could I somehow lay the blade down on the stone and peek under there to see if I was holding the blade at the correct angle. So I am 100% sure that never in my life have I ever held the knife anywhere close to the existing blade angle. Because I was unsure about what I was doing I was tenative and only stroked the blade a few times before giving up. The result is that I have never been able to sharpen a knife. I imagine my efforts looked something like this:
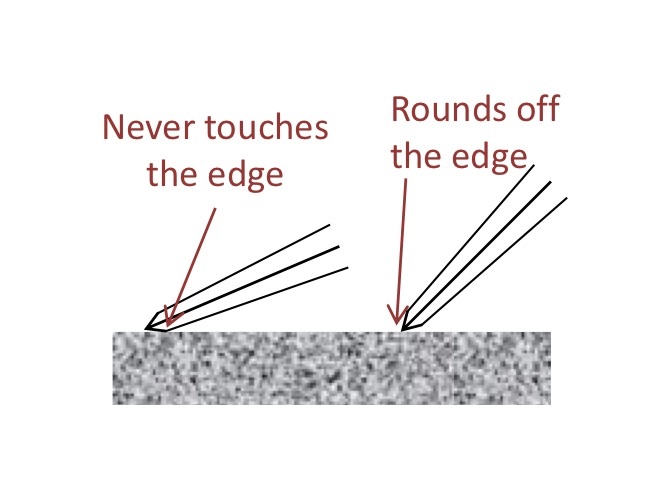
But this weekend I had some time on my hands so I thought I would try again. The knife I was sharpening had no edge at all so there was nothing to lose if I screwed up. It was worn down so much that it was visibly rounded off so I was spared e requirement of having to determine the existing blade angle. I simply laid the knife down at an angle that felt right and I started honing. It took a good bit of time to work that steel down to an edge.
I tested the edge at various points along its length by very lightly placing the edge onto my finger nail and found that the blade would hang on my finger nail in the middle of the blade but not at the base or tip.  I interpreted this to mean that I had not sharpened the edge evenly and needed to continue sharpening the ends. To help me see what I was doing wrong I took a tip from Blademag.com. They recommended using a permanent marker to color the edge so that I could see tail tell wear marks indicating my honing pattern. When I did that it was clear that I simply had not worn away enough metal from each end of the blade. So I kept honing focusing my efforts on the ends until the black ink was worn away and the blade would consistently hand my finger nail from blade end to end.
Inspection of the blade edge showed a sharp but course edge. I could easily see the scratches that the course stone left in the steel. The edge looked serrated but on a much finer scale. AH HA, thats what the finer side of the stone is for, to polish out those scratches! So just like in any sanding operation I used the finer stone to remove the scratches by honing down the steel until I got a uniformly smooth edge from end to end. As before I noticed that the center of the blade became smooth first so I gave each end a little extra attention then I tested for sharpness. Final inspection showed a much smoother edge but I could still see scratches left by the stone albeit shallower and closer together and a fine serration was still evident.
So step 3 was to polish the edge. I watched a video by Ray Mears that showed him polishing off the edge of his knife using a 6000 grit stone but I did not have such. A friend of mine advised using very fine sand paper so after some searching I found 2000 paper in the auto section of Walmart. The final polishing process proceeded just like the other steps except instead of using a wet stone I used the dry sandpaper as my honing media with the paper laid onto a flat surface, in this case a piece of plywood. The sandpaper really made a difference in the edge surface. It took about 100 strokes to do the job but in the end the edge was not just smooth, it was polished. And WOW. The knife was Sharp Sharp. In fact the knife was sharper than any factory fresh blade that I ever had. I tested it out on an old hard piece of 1/2″ nylon line and it sliced through it easily and cleanly. No lie. I have never had a knife that could cut through an old piece of rope without leaving a frayed end but this thing made a super clean cut without any fray at all.
Well being OCD like I am I spent the rest of the day sharpening all of my other knifes and even took in a few from the neighboring boats to sharpen. I would say that I experienced another Boating Lessons Learned.
OH. And thanks to all of you that have entered AMAZONthrough my blog and made purchases. It costs you no more to enter through my blog but when you do I receive a small percentage and it adds up. THANKS.
The content herein has a single theme: Mistakes …. or as I call them “Boating Lessons Learned”. While there may be elements of this site that appear to be advice about how to do some task you can be assured that it is not a complete and accurate “how to”. I am partially describing how I did something and what I learned. Do not rely on this information because Mcmanusboatworks.com makes no representations as to accuracy, completeness, correctness, suitability, or validity of any information on this site and is not liable for any errors, omissions, or delays in this information or any losses, injuries, or damages arising from its display or use. All information is provided on an as-is basis.

It’s such a good feeling when you get a knife sharp for the first time! Now that you have your edge it’ll be easy to maintain it with just a few edge-trailing strokes on that 2000 grit paper. Welcome to the sharp side!
Thanks for the feedback. I am sure that your clients love it when you hand over a newly sharpened kitchen knife. Look out Tomatoes!
As a pro can you provide other knife sharpening Lessons Learned?
It sounds like you’ve got the basics well in hand. If you’re working on someone else’s knife and you want to keep the factory angle, the easy way to find it is to start with the knife flat on the stone, edge facing away from you, then push forward while you slowly raise the spine of the knife. You’ll feel it when the edge begins to bite at the stone. Stop there and lower the spine back a hair and you’ve got your angle. It’ll save you work if you’re not cutting a new bevel every time you sharpen. Keep it up!
Ah. Excellent advice. Thanks so much for sharing your expertise.
I know one incident that you had a very sharp knife……………the time our boat had NO REVERSE as we were pulling into a very crowded anchorage at area 51! Glad you had the knife and any knife would have worked. Even chewing the line with teeth, to keep us from running over everything in site! We sure miss ya’ll and now that I know about your blog…….you’re gonna see lots of comments from me!
🙂