
BLUF: I need to be more observant and pay closer attention to the small details if I expect to improve my carburetor troubleshooting skills.
I enjoy working on carburetors. They are engineering and manufacturing works of art. No other engine part has more affect on how well an engine runs than the carb. It is amazing to me that they are capable of delivering a precise mixture of fuel and air over the entire engine RPM range. But the tiniest little thing can cause one to operate improperly. It requires a keen eye to find it. My friend Larry has an eye for such a thing. It is amazing to me to watch him disassemble a part and point out the slightest flaw that is the cause of the malfunction. It might be a tiny crack in an o-ring or faint discoloration on a bushing.
If a carb is left to sit for a long period of time the fuel will evaporate and leave behind a varnish like residue that gums up the passages. If this happens often enough these works of art transform an engine into a cantankerous beast. Unfortunately this is the mode of operation for most gasoline engine powered boats.
One of my good friends has a small outboard engine that would no longer run. It cranked right away with a shot of starter fluid revealing the problem to be fuel related.

Given the engine sat idle for long periods of time between use I recommended that the carb be rebuilt. He was able to get a carb rebuild kit for under $50 and a can of Berryman Carb Cleaner for under $30 at the local auto parts supply house. A carb must be soaked in an appropriate solvent to loosen the deposits hiding within the carbs passages so they can be blown out with compressed air. Time and again I have seen repairmen remove the carb for rebuild and return in an hour with what they call a rebuild. I just don’t see how they can remove the junk in that short a period of time. What I do is soak a carb overnight in Berryman Carb Cleaner. It comes in a resealable metal paint can and it includes a strainer basket to hold the small parts while they soak. The lid reseals tightly and I can use it again and again so even though it costs $30 a can it is a good investment because cleaning out all the tiny passages is the key to a good rebuild. But I digress.
Upon installation of the newly rebuilt carb he found that it leaked gasoline profusely and since he could not crank the engine and watch for the leak at the same time he asked that I help him find the source. It turned out to be coming from the carbs fuel bowl vent and upon further inspection fuel could be seen streaming up and out of the main jet port within the venturi.

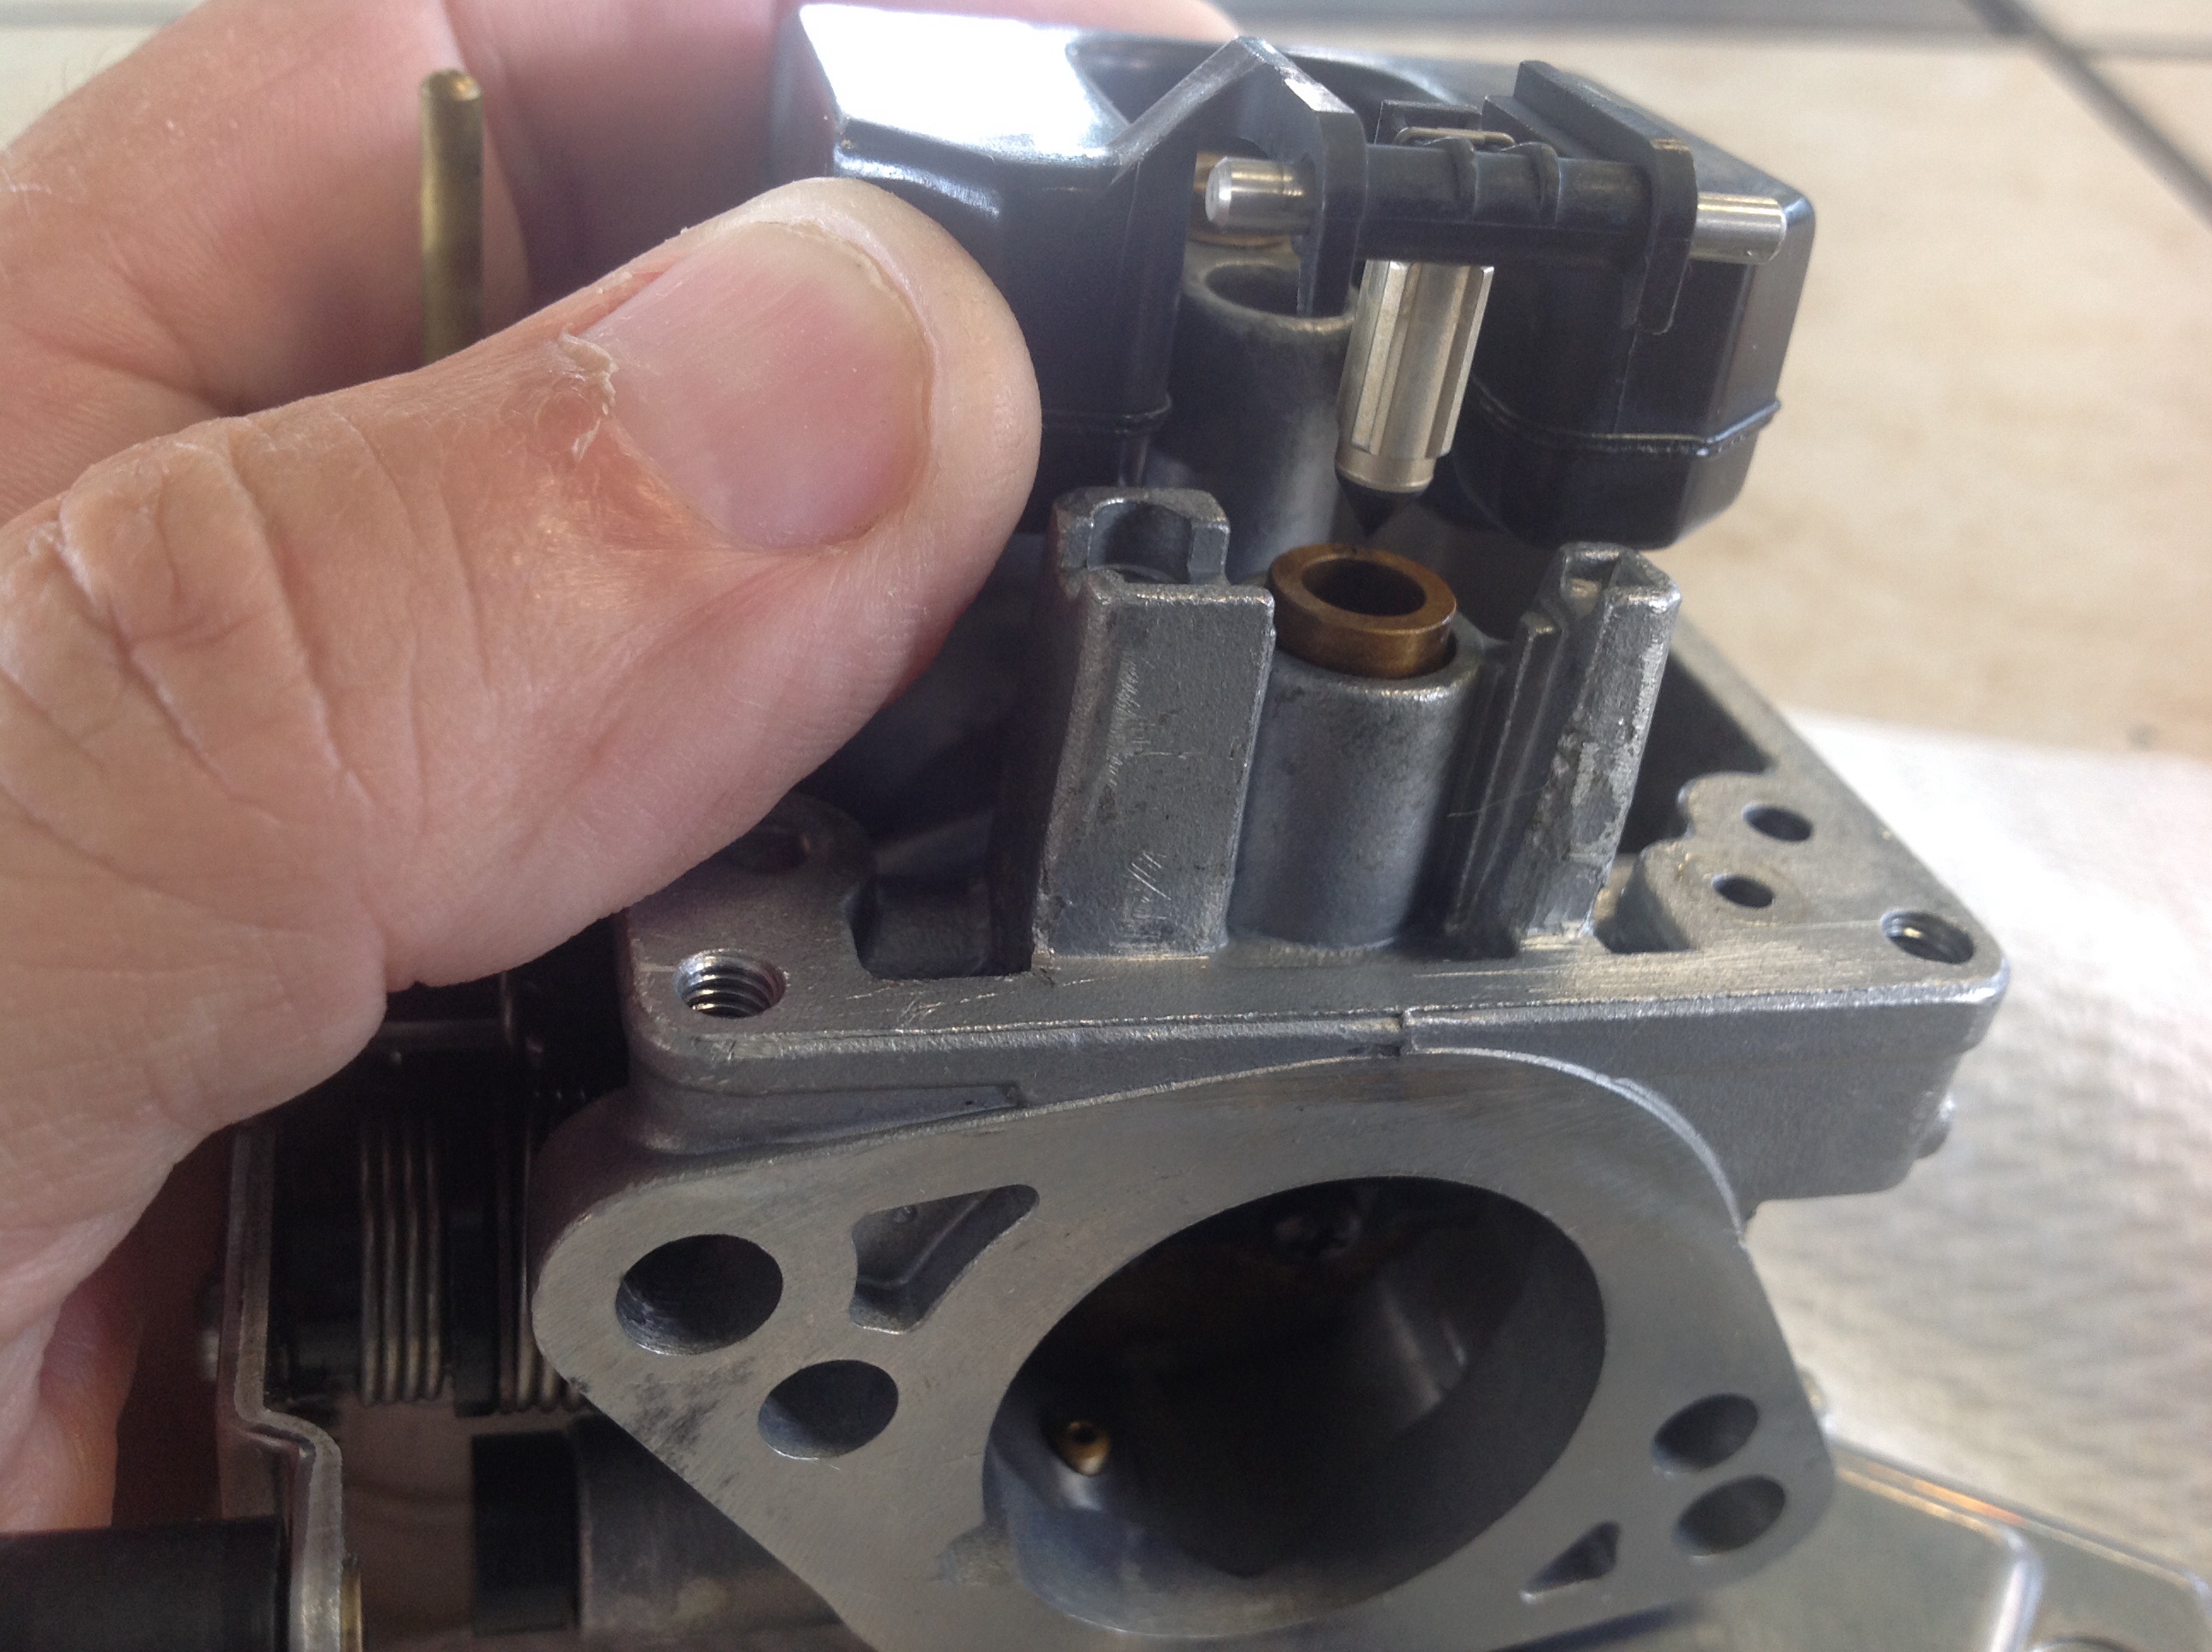
Main Jet Passage
So I am thinking to myself that the cause has to be a malfunctioning fuel bowl float valve. How else could fuel be pumping up and out of the fuel bowl vent. I tested it to see if the valve was sealing by blowing into the fuel inlet. I really should have taken the time to find a clean length of fuel line to blow through because that petrol really doesn’t taste very good. Must have been a bad vintage :-). Hum. I was sure the valve was the problem but it was sealed tightly.
But just to satisfy myself I removed the fuel bowl and inspected the float, needle, and seat anyway. It all looked good at first glance.
Float with Needle Valve Exposed
My friend reported that he had replaced the old needle but that the kit did not come with a new brass seat which I thought was odd. Maybe the new needle was not the right match for the old seat so I asked that he see if he could find the old needle so I could compare it with the new one to confirm its compatibility. While he was gone my trusty side kick did a bit of nosing around and pointed out the real cause of the problem.

And sure enough she was right. She is so smart.
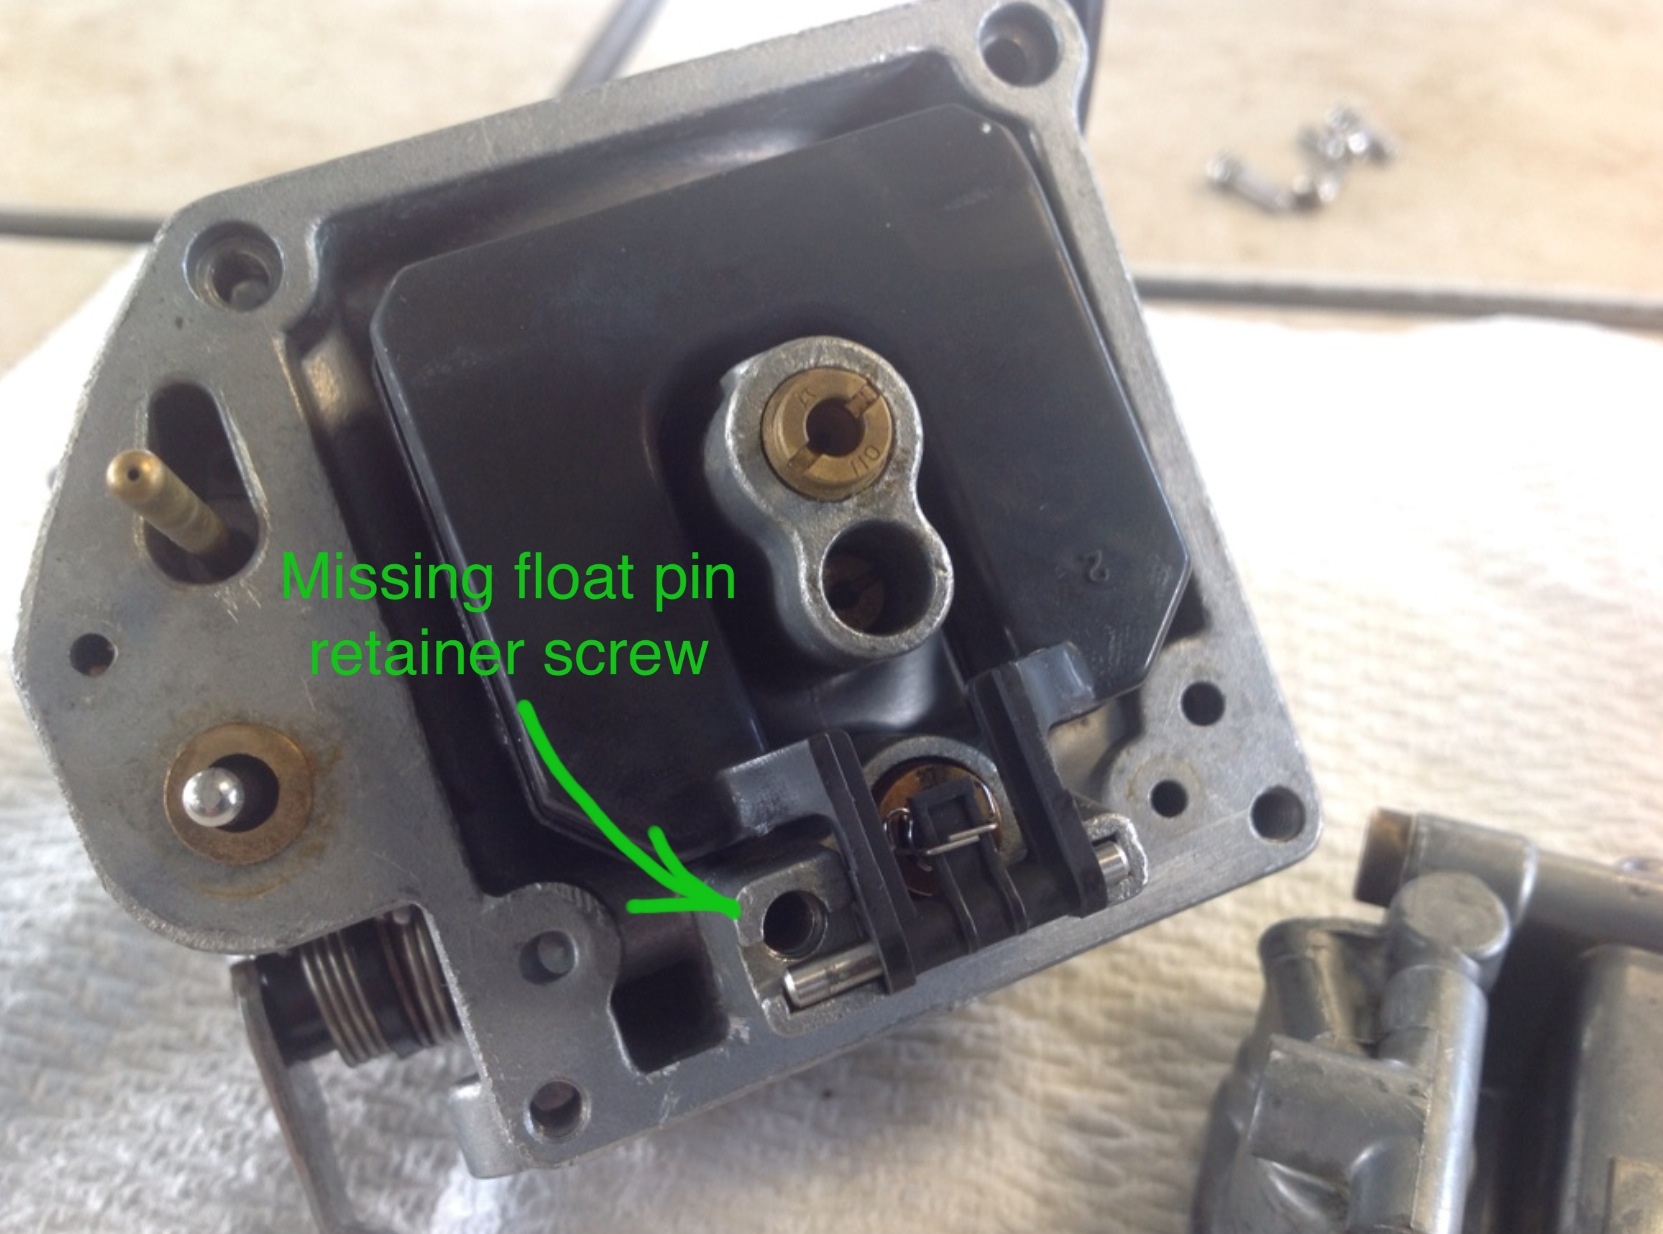
Retaining Screw Missing
So I sent a quick text and my friend who soon returned with both the old seat and the missing screw which he reports was left over after the rebuild. Well that was the cause of the fuel leak. That screw is designed to keep the float in place and without it the needle would not seat properly. Funny how it is that there is always an extra part or two left over after such a job. It really helps me to have a good diagram to go by when I do a rebuild. I have a couple of good carb books that cover the most common marine carburetors. HP Books publishes a number of very good books on engine and carburetor repair. I have a shelf half full of them. CLICK HERE for a link to a book that I find helpful. The price of the book plus a rebuild kit is about half what I had to pay for someone to rebuild just one of these carbs for me.
Boating Lessons Learned: My take aways are get a good carb book, get a can of carb cleaner and soak the carb overnight, and be organized and observant in the disassembly and assembly process.
This post is for informational purposes only. The content herein has a single theme: Mistakes …. or as I call them “Boating Lessons Learned”. While there may be elements of this site that appear to be advice about how to do some task you can be assured that it is not a complete and accurate “how to”. I am partially describing how I did something and what I learned. Do not rely on this information because Mcmanusboatworks.com makes no representations as to accuracy, completeness, correctness, suitability, or validity of any information on this site and is not liable for any errors, omissions, or delays in this information or any losses, injuries, or damages arising from its display or use. All information is provided on an as-is basis.
