Boating Lessons Learned: The Best Anchor Line

Buccaneer Rope has a new product that I am very excited about. It is a 12-strand braided line and it comes in nylon, polyester, and aramid fiber. The nylon is especially good for use in anchor line applications. CLICK HERE

I have used the 8-Strand anchor line produced by Buccaneer Rope CLICK HERE for over 10 years now and it has served me very well. The design of the braid makes it well suited for windless applications. Many times I have seen this line cure the situation where the windless would no longer grab the anchor line and reel it in. When the Buccaneer 8-Strand Braided line was installed the windless worked like new again with minimal line slippage.

Buccaneer's 12-Strand Windless Rope

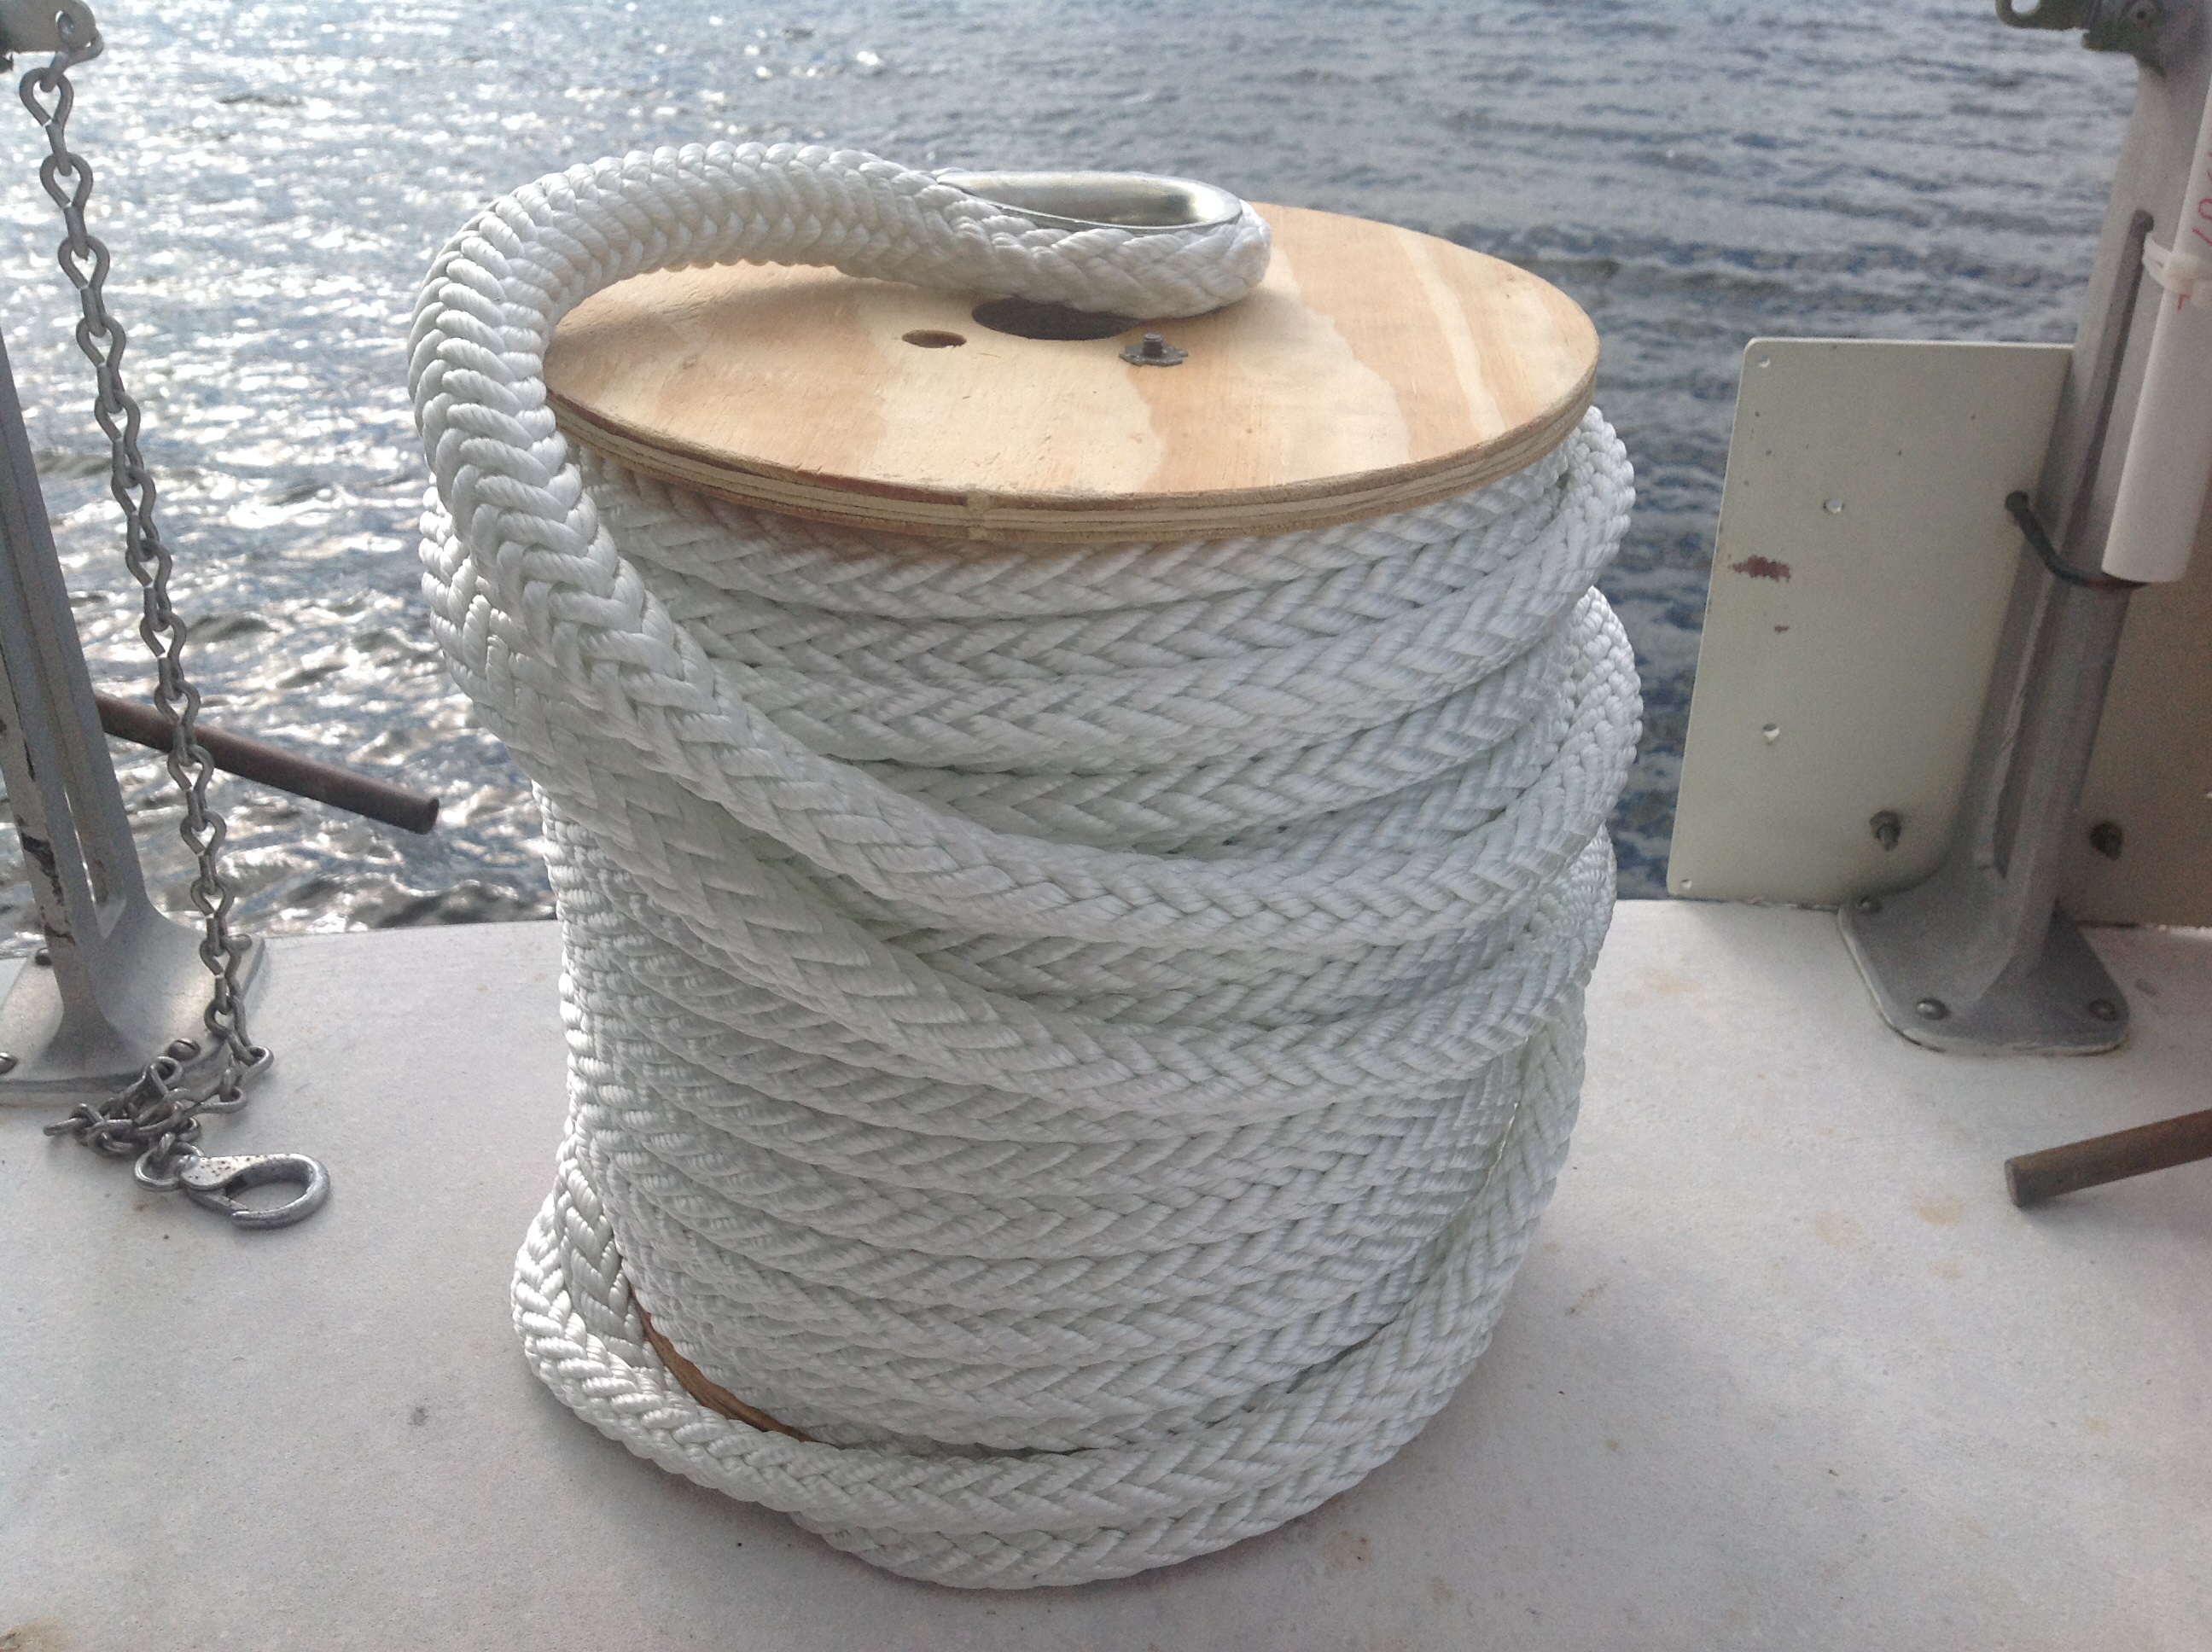
Buccaneer’s 12-Strand Windless Rope

So I was excited when Buccaneer asked me to test their new 12-Strand rope. Isn’t that a gorgeous roll of line?   Beautiful stuff!  Buccaneer 12-Strand plaited rope is non-rotational thus eliminating hocking and other problems associated with twisted anchor line. This may sound like an odd way to describe a line but it is supple. It flakes effortlessly and does not kink up like a twisted line.

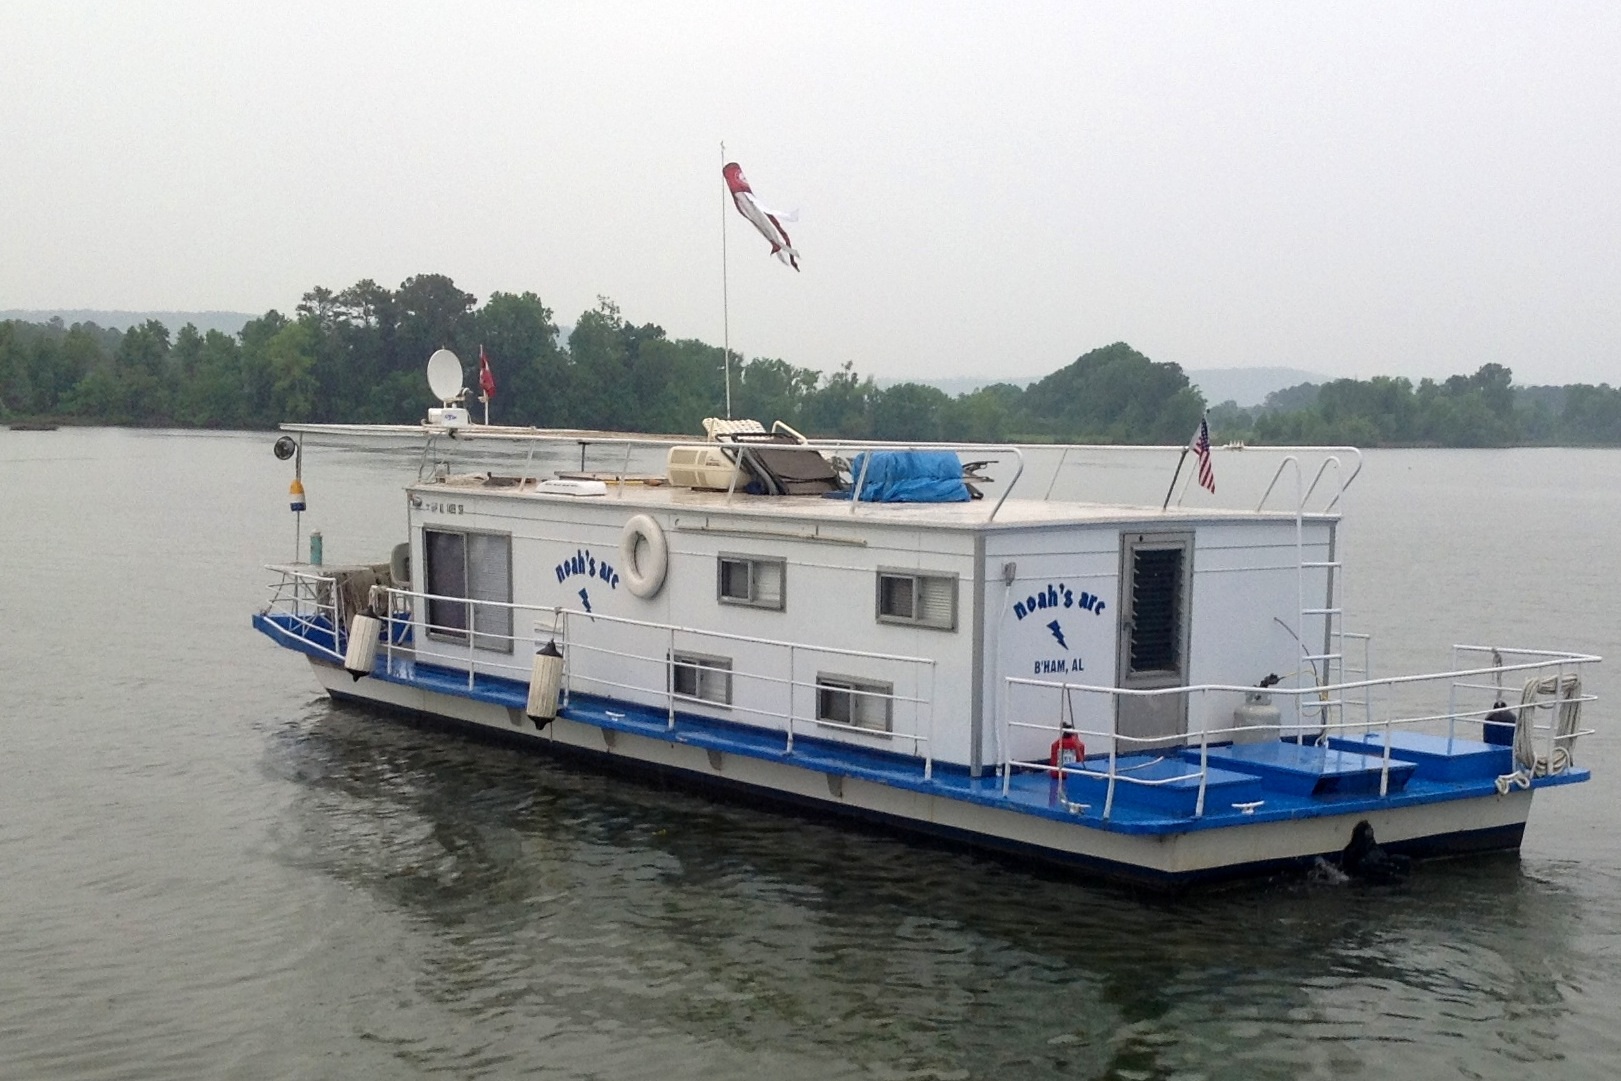
We purchased a 55′ Plukebaum a few years back and I have been been meaning to replace the old anchor line.  The old line was high dollar stuff when it was purchased and it is still functional despite it being a bit stiff.  The problem was that it was impossible to feed it down through the hawse pipe so it had to be stored on deck.  What an unsightly mess:
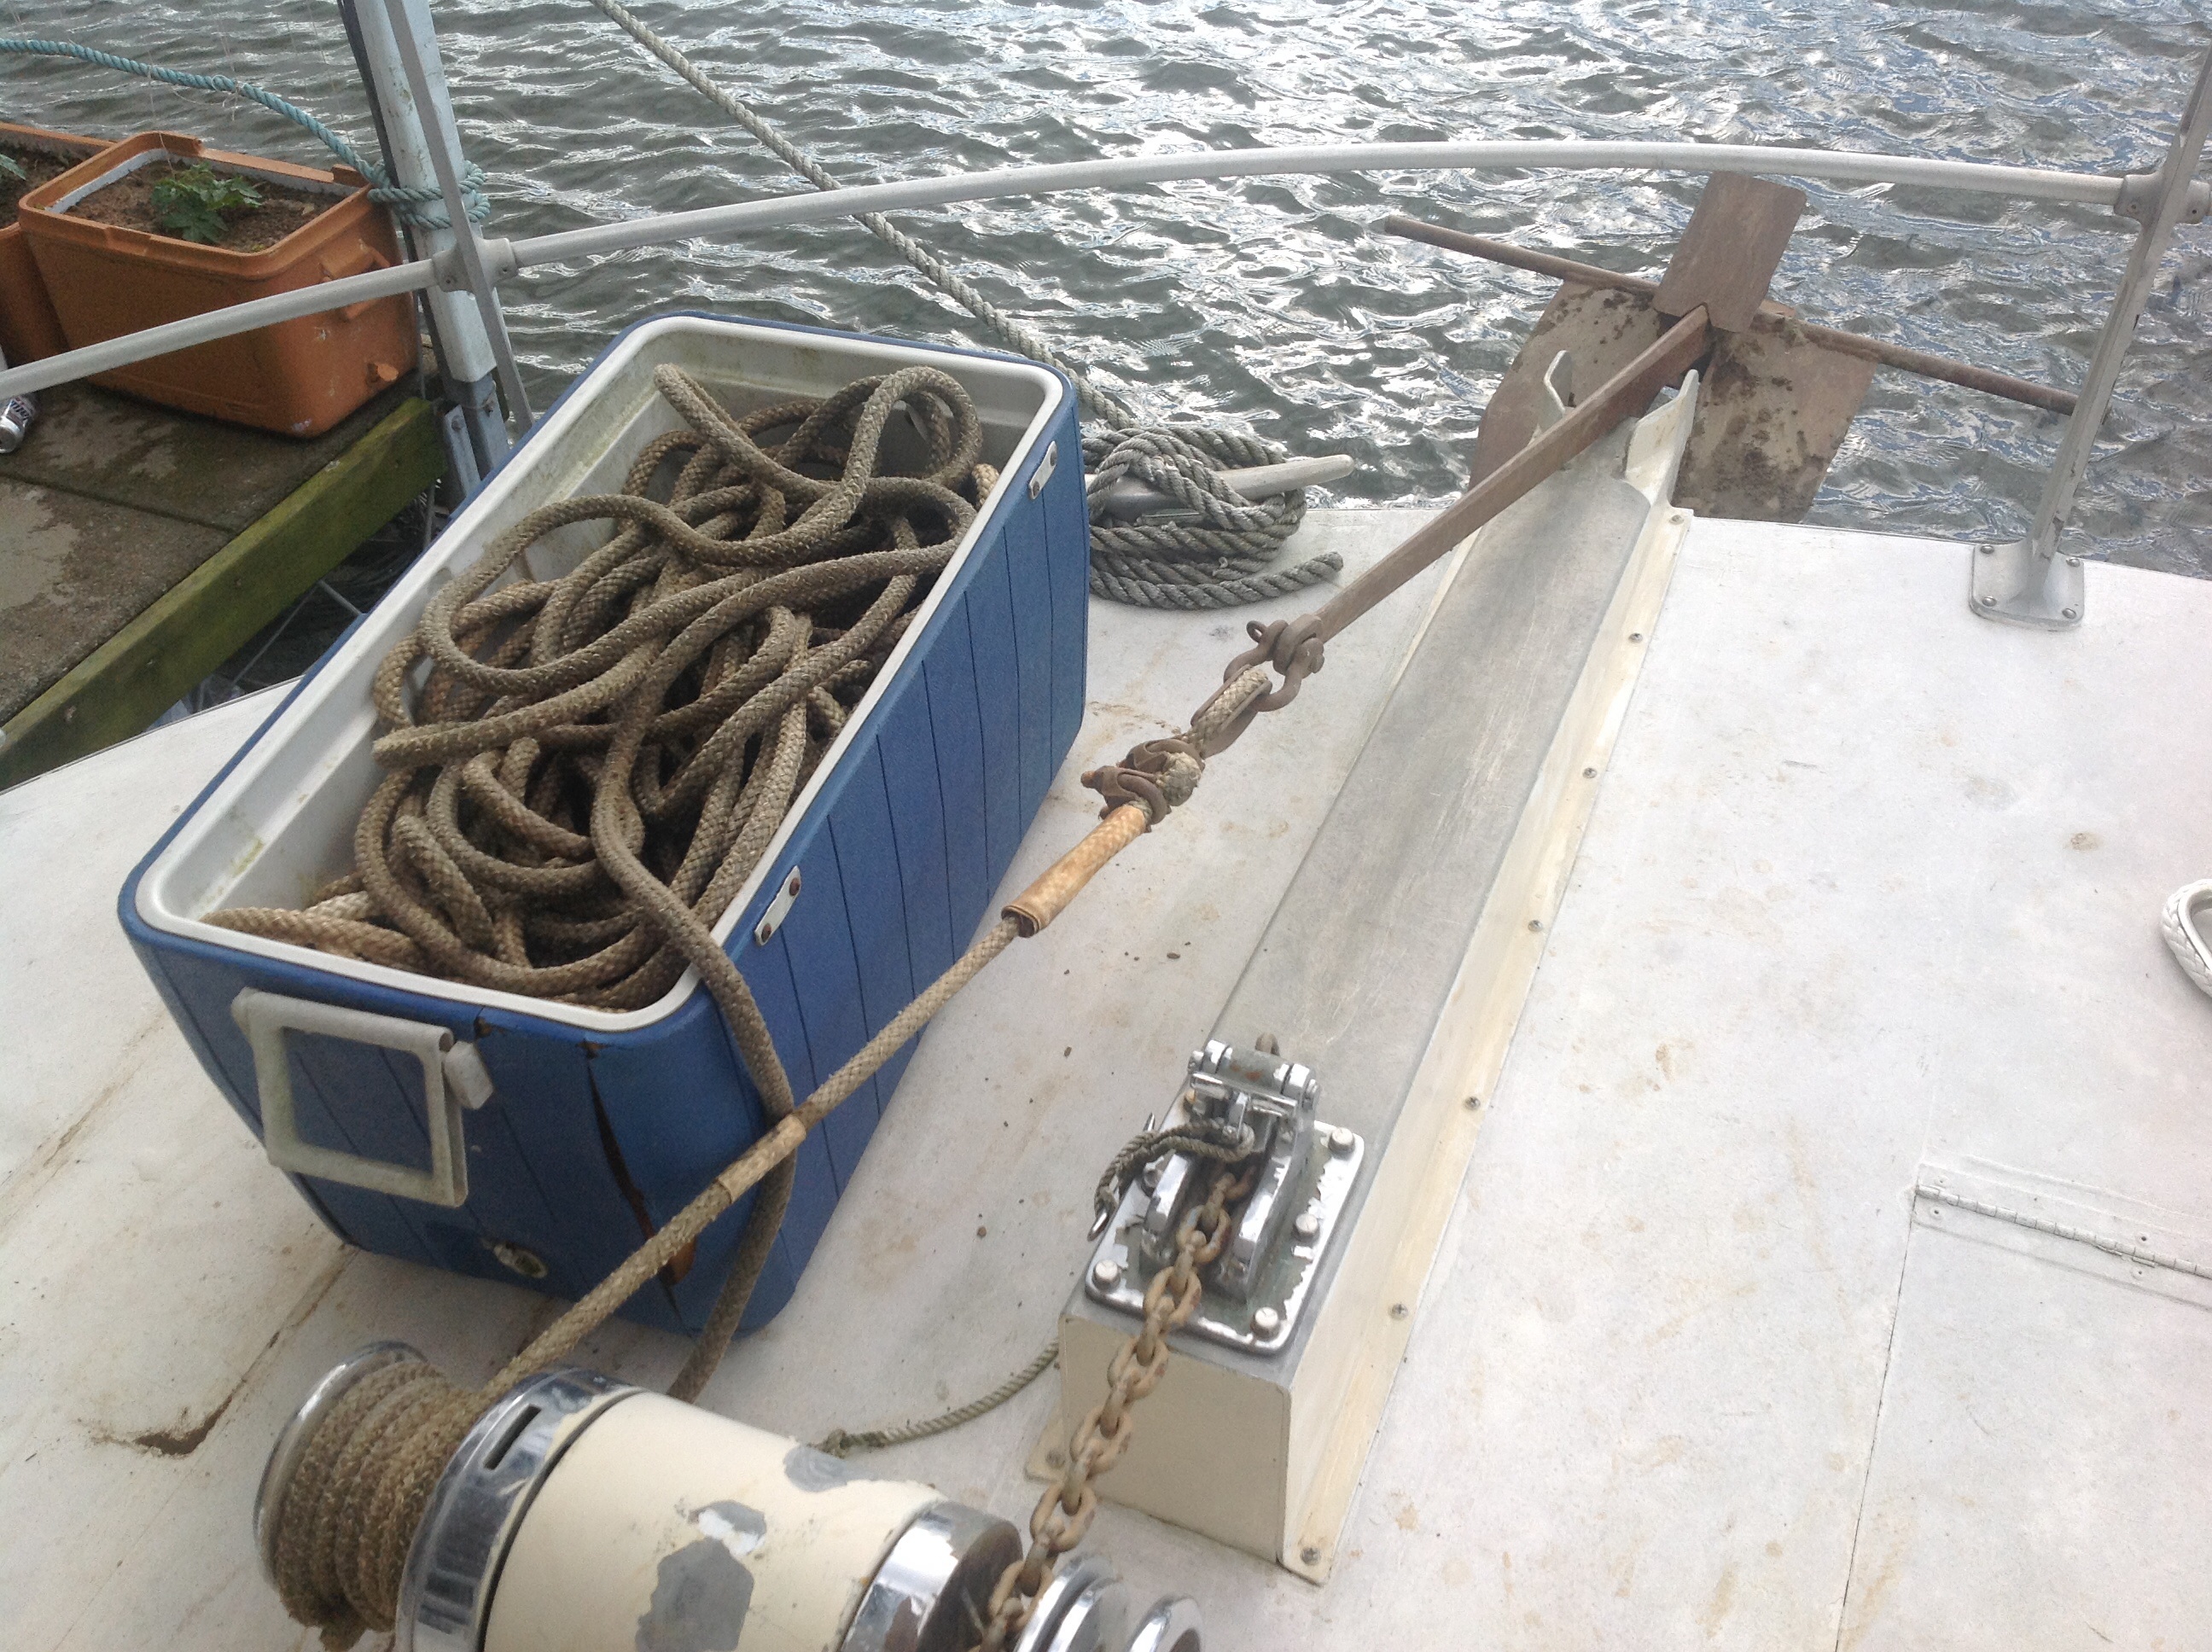
What A Mess

What A Mess

Like all the Buccaneer 8 strand lines I have used this new 12-Strand line is a work of art. The following short clip demonstrates how effortlessly this line flakes. This ability makes it very easy to feed down the hawse pipe or onto the deck. It also significantly reduces the chances of the line knotting up in the anchor locker.

http://youtu.be/AaJ9NybAHIg

This rope is very supple and has a good feel to the hand making it easy to wrap around a cleat and get a good tight clinch. It is also extremely strong with the 3/4 line reported by the manufacturer to have a breaking strength of 16,500 lbs with a working strength of 4125 lbs. It is nice to know that the line is both easy to work with and extremely strong. The following video will show how different the 12-Strand braid is from the standard 3 strand twisted line.

http://youtu.be/2i0JadWbg5g

The 12-Strand line is so new it is only available directly from the manufacturer by calling 256-587-6232 or emailing sales@bucrope.com.

CLICK HERE to find a large selection of Buccaneer Rope products through Amazon.com

Thanks to all of you that have entered Amazon through my blog and made purchases. CLICK HERE. It costs you no more to enter through my blog but when you do I receive a small percentage and it adds up. THANKS.

This post is for informational purposes only. The content herein has a single theme: Mistakes …. or as I call them “Boating Lessons Learned”. While there may be elements of this site that appear to be advice about how to do some task you can be assured that it is not a complete and accurate “how to”. I am partially describing how I did something and what I learned. Do not rely on this information because Mcmanusboatworks.com makes no representations as to accuracy, completeness, correctness, suitability, or validity of any information on this site and is not liable for any errors, omissions, or delays in this information or any losses, injuries, or damages arising from its display or use. All information is provided on an as-is basis.

Posted in Boat Mechanical, Navigation | Tagged , , | Leave a comment

Boating Lessons Learned: Testing the Ignition Switch

Testing an ignition switch is pretty straight forward.   In a previous post I showed the test I used with the switch wired into the circuit.  Since the switch was soldered into the circuit I questioned whether I was reading the resistance through the switch or through the wiring itself.   The correct way to test the switch is to disconnect the wires and test it as shown below.  It is a bit hard to see but I have the multimeter dial set to the 200 ohm range and I have the leads connected to the Bat. & Ign. terminals.  I checked the resistance in both the start and run position.  To test the starter circuit I simply connected the meter between the Bat. & Str. Terminals and held the key in the start position.

Faulty Ignition Switch

Faulty Ignition Switch

I located a good description of how to test starting circuit and the wiring to the starter on a site managed by Clark’s Garage.   There are some other good instruction here like how to test an ignition coil.  Here is a link to the full shop manual published on the web by Clark’s Garage.  CLICK HERE   Click on the link to their Garage Manual included on the left side of the screen.

This post is for informational purposes only. The content herein has a single theme: Mistakes …. or as I call them “Boating Lessons Learned”. While there may be elements of this site that appear to be advice about how to do some task you can be assured that it is not a complete and accurate “how to”. I am partially describing how I did something and what I learned. Do not rely on this information because Mcmanusboatworks.com makes no representations as to accuracy, completeness, correctness, suitability, or validity of any information on this site and is not liable for any errors, omissions, or delays in this information or any losses, injuries, or damages arising from its display or use. All information is provided on an as-is basis.

Posted in Boat Mechanical | Tagged , , , | Leave a comment

Boating Lessons Learned: Women Taking the Wheel.

Yikes! For some reason I feel like I am treading on thin ice here. I almost couldn’t type the title of this article. It seemed sexist. But for some reason you rarely see women docking the boat so I thought it might be interesting to explore some possible reasons why and what might be done to change the trend.

I thought I would begin by exploring some examples of female pilots I have met during my 50 years of boating and the characteristics that may have led them to breaking the paradigm.

The first to come to mind was a single business woman with a strong personality that owned an aluminum 32′ Marinette. I was young at the time so I do not remember much about the situation other than she suffered the fate of many new boat owners in that she had a lot of trouble docking the boat. I recall my Dad commenting after a particularly harrowing event that any captain would have difficulty docking the Marinette because it’s light hull and shallow draft made it very susceptible to drifting in a cross wind. But she was diligent and did not let a few setbacks deter her.

We had some looper friends a few years ago. The wife was clearly the captain and the husband was generally engaged in the role of engineer and 1st Mate. This worked well for them. As in the first example she possessed an assertive personality seeming to enjoy being in control. She planned the routes, was the radio operator, and piloted the boat most of the time. He seemed to enjoy tinkering with the mechanisms and maintaining the bright work and as far as I could tell he spent his days on the river tending to the functional and cosmetic aspects of the boat. Together they ran a taught ship.

I have known a couple women that would take on the role of captain when their husbands were not available to do so. One of them would take the family boat out for a swim during the summer months. Another would venture out in the pair’s cuddy cabin for a day trip now and again but I don’t recall her ever piloting their 50 footer. Again both of these women possessed assertive personalities.

I have two friends that have recently become single and have become the sole proprietors of their boats. One is recently widowed and the other recently separated from her significant other. Neither were regular boat pilots in the past and they are now somewhat reluctant in their new role as Captain. But they both have taken on the challenge to become proficient at piloting their boat. They are becoming more and more confident in their skills with every trip out on the water.

Boating Lessons Learned: Albeit a small sample one could conclude that assertive personalities require little or no encouragement to take on the challenge but I imagine there is more to be learned from these latter two ladies! Like why did they choose to keep the boat when one might expect them to sell it? What motivated them to want to learn to Captain the boat themselves? What fears did they have to overcome if any? What instructional methods we beneficial and why? What methods were counter-productive?

If y’all are interested I will see if one or both of them might be willing to share experience. Please leave a comment and share your thoughts on the subject.

This post is for informational purposes only. The content herein has a single theme: Mistakes …. or as I call them “Boating Lessons Learned”. While there may be elements of this site that appear to be advice about how to do some task you can be assured that it is not a complete and accurate “how to”. I am partially describing how I did something and what I learned. Do not rely on this information because Mcmanusboatworks.com makes no representations as to accuracy, completeness, correctness, suitability, or validity of any information on this site and is not liable for any errors, omissions, or delays in this information or any losses, injuries, or damages arising from its display or use. All information is provided on an as-is basis.

Posted in Live Aboard, Navigation | Tagged , , , , | Leave a comment

Boating Lessons Learned: Troubleshooting Requires Attention to Detail

BLUF:  I need to be more observant and pay closer attention to the small details.

I enjoy working on carburetors.  They are engineering and manufacturing works of art.  No other engine part has more effect on how well an engine runs than the carb.  It is amazing to me that they work at all.  They have to deliver a precise mixture of fuel and air over the entire engine RPM range.  The tiniest little thing can cause one to operate improperly and it requires a keen eye to find it.  My friend Larry has an eye for such a thing.  It is amazing to me to watch him disassemble a part and point out the slightest flaw that indicates the cause of the malfunction.  It might be a tiny crack in an o-ring or a faint discoloration on a bushing.

Recently a friend of mine had just complete rebuilding the carburetor on his 25 Hp outboard motor.  He installed the newly rebuilt carb only to find that it leaked gasoline profusely and he asked me to help him find the source.  It turned out to be coming from the carbs fuel bowl vent and upon further inspection fuel could be seen streaming up and out of the main jet port within the venturi.

Main Jet Passage

Main Jet Passage

So I am thinking to myself that the cause had to be a malfunctioning fuel bowl float valve.  What else would cause fuel to be pumped up and out of the fuel bowl vent?  So I removed the carburetor, drained the fuel from the bowl, and turned it upside down so that gravity would close the float valve. I then tested the valve by blowing into the fuel inlet.  Boating Lessons Learned – I really should have taken the time to find a clean length of fuel line to blow through because gasoline does not taste very good :-).

But huff and puff as I might the valve proved to be sealed tightly. Oh well.  I was sure the valve was the problem.  But with no other leads to go on I removed the fuel bowl and inspected the float valve assembly.

Float with Needle Valve Exposed

Float with Needle Valve Exposed

I noticed that the pin that the float pivots on was slightly out of place and I presumed that possibly it’s travel was being impeded.   I put it back in its groove, reassembled the carb, and tried it again.

Darn, it still leaked.  After trying a couple of other things only to achieve the same results I was stymied.  I sat there for a while scratching my head and for the life of me I could think of no part other than the float valve that would create these symptoms.  So with no other options I asked my friend to go get the old needle so we could look to see if possibly the kit came with the wrong one.

While he was gone I piddled around taking the pictures that you see here and got some unsolicited feedback from Molly.

image

Where did she learn so much about carburetors?

Retaining Screw Missing

Retaining Screw Missing

How could I have missed that? That little detail had been staring me in the face the whole time. While I was happy that I had discovered the root cause as to why the valve was not functioning I was disappointed with myself that I was so unobservant.

Of course it would have helped if we had a manual on the carb that laid out the rebuild steps in detail with accompanying photographs.  The devil is in the details on such an intricate mechanism. HP Books publishes manuals for the more common carbs.  I recently broke down and decided that I needed to learn more about the Rochester after spending $600 farming out 3 of them for rebuild.  The price of the book plus a rebuild kit is about half what I had to pay for someone to rebuild just one of these carbs.

My friend was able to locate the missing screw and in no time we had it back on the engine and running fine.  But I am still kicking myself.  I bet Larry would have noticed the missing screw right away.

Boating Lessons Learned:  Troubleshooting Requires Attention to Detail.

This post is for informational purposes only. The content herein has a single theme: Mistakes …. or as I call them “Boating Lessons Learned”. While there may be elements of this site that appear to be advice about how to do some task you can be assured that it is not a complete and accurate “how to”. I am partially describing how I did something and what I learned. Do not rely on this information because Mcmanusboatworks.com makes no representations as to accuracy, completeness, correctness, suitability, or validity of any information on this site and is not liable for any errors, omissions, or delays in this information or any losses, injuries, or damages arising from its display or use. All information is provided on an as-is basis.

Posted in Boat Mechanical | Tagged , , , | Leave a comment

Boating Lessons Learned: The Journey

You have to read this.  It may CHANGE YOUR LIFE.

Did that get your attention?  I thought it might.

I wrote a post a few months back about projects.  I was struggling with the fact that thinking about how difficult it will be to get to the goal, any of life’s goals for that matter, was discouraging at times.   While I dreamed of  success, creating mental images of arrival at the destination, I often question whether it was really worth the sacrifice.  Is life not more about the journey than the destination?  Or more accurately … Is life not the journey itself.   The destination is the end.   There may be bragging rights associated with the achievement but is getting to the end worth sacrificing life experiences along the way?

I leave those questions to be answered by Pockets.   She is a friend of mine and she is currently hiking the PCT.  Pockets has shared with us her thoughts on the subject and I encourage you to take the time to read this post

Pockets on the PCT

Pockets on the PCT

Posted in Boat Electrical | Tagged , , , | Leave a comment

Boating Lessons Learned: Wiring Labels

Boating Lessons Learned:  Use Wiring Labels

BLUF: When I have to disconnect wiring I like to label both the piece of equipment and the wires so that I can confidently reconnect the wires to the correct terminal.

I am currently working on a project to replace the ignition switch on a boat. At first glance it looked like a straight forward job and it looked like it would be easy to remember which wires go where. But when I began to install the new switch I stripped the terminal screw on the battery connection so I had to leave the job unfinished while I went back to the store to get a replacement switch.

If you look closely you can see the Wire Markers

If you look closely you can see the Wire Markers

Well it is now day 2 of the job and I have not gotten back to the store.  But I am confident that I will get the wiring straight because I marked the wires before I took them off.

A pack of wire markers lasts a long time, years in fact, so they are a low cost investment.   The better quality markers run me over $20 per pack but they are worth it compared to the lower cost labels that are available at the big box stores.  They stick better and stay on the wire through heat and rough handling.

I find that the labels pay dividends long after the job is complete.  Years ago I was looking to purchased a boat that was owned by an electrical engineer. He had labeled just about every wire in the boar and had a notebook with sketches to boot.  When I saw all the care he put into organizing the systems I had more confidence that he had maintained the rest of the boat as well.  I did not even dicker with him on the price.  I could see that the boat was well worth the price that he was asking.  I can’t put a dollar value on the impact those labels but it surely was more than the $20 that they cost him.

Boating Lessons Learned:  Use Wiring LabelS

This post is for informational purposes only. The content herein has a single theme: Mistakes …. or as I call them “Boating Lessons Learned”. While there may be elements of this site that appear to be advice about how to do some task you can be assured that it is not a complete and accurate “how to”. I am partially describing how I did something and what I learned. Do not rely on this information because Mcmanusboatworks.com makes no representations as to accuracy, completeness, correctness, suitability, or validity of any information on this site and is not liable for any errors, omissions, or delays in this information or any losses, injuries, or damages arising from its display or use. All information is provided on an as-is basis.

Posted in Boat Electrical | Tagged , , , | Leave a comment

If you recall a couple of posts back I was troubleshooting an intermittent 12 volt DC problem on Whacker’s boat.

1961 Drifter, Steel Hull, Single 4 cyl Chevy.

1961 Drifter, Steel Hull, Single 4 cyl Chevy.

Well establishing a common ground between the engine and house battery systems did not eliminate the intermittent electrical problem. The engine continued to die. It would sound like I turned off the ignition switch. The engine did not bobble at all. It would just died. Sometimes the starter would engage but it would not fire. Sometimes the starter would not even engage. You know it’s kinda embarrassing when you tell someone you have the boat fixed only to have the problem return. So I was back troubleshooting the 12 volt DC ignition circuit.

In my last session I had skipped over testing the ignition switch … for no good reason really. Standard practice is to remove the wires from the switch and test for continuity and resistance across the terminals. Disconnecting the wires eliminates the current pathway through the wiring and the potential for reading the resistance of that pathway instead of through the switch. But the wires on this switch were soldered in so I would have to cut the wires to test it.

image


But I was at my wit end so I tried measuring the resistance between the terminals with the wires still connected.

Testing Ignition Switch Resistance

Testing Ignition Switch Resistance

Wow. The resistance is 194.5 ohms.   It should be less than 0.03 ohms. If I wiggled the key a bit the resistance would jump up and down ranging from 1 ohm to infinity.  Hum.  This old switch is bad. Makes me wonder why the resistance through the wiring side of the circuit is so high. I am gonna have to ponder on that one. Seems there might be a secondary ignition solenoid on the engine. But that’s for another day.

Off to the parts house for a new switch.  In the mean time if you are interested in a detailed explanation of how 12 Volt DC circuitry works you might want to turn to The 12 Volt Bible for Boats.  It is one of the best sources for information I have found. While this book did not make me an expert it did significantly expand my understanding of 12 volt systems and how to troubleshoot them. I bet somewhere in there it says … Don’t neglect to test the ignition switch.

Oh well. Another Boating Lessons Learned.

This post is for informational purposes only. The content herein has a single theme: Mistakes …. or as I call them “Boating Lessons Learned”. While there may be elements of this site that appear to be advice about how to do some task you can be assured that it is not a complete and accurate “how to”. I am partially describing how I did something and what I learned. Do not rely on this information because Mcmanusboatworks.com makes no representations as to accuracy, completeness, correctness, suitability, or validity of any information on this site and is not liable for any errors, omissions, or delays in this information or any losses, injuries, or damages arising from its display or use. All information is provided on an as-is basis.

Posted on by McManus Boat Works | Leave a comment

Boating Lessons Learned: Calibrating a Thermometer

BLUF: I use ice water to check the calibration of thermometers.

In my last post I shared with you a trick my Dad taught me where he briskly rolls a warm drink can in ice water to chill the drink in a couple of minutes.

My Dad taught me another trick. I use an ice water mixture to test the accuracy of immersible thermometers that I use to test meat for doneness. Getting a precise temperature measurement is important to me particularly when I smoke a pork tenderloin. I like to take it off the smoker right at 142 degrees F. and let it carryover cook to about 147. The result is a tender piece of meat that is just past the pink stage but still juicy. If a tenderloin is cooked to 150 or above it starts to dry out. If the temperature is below 137 then they say that is not safe. So a precise temperature measurement is important to me.

The test method I use is to fill a glass about half way to the top with ice. I add tap water to cover the ice plus a bit more. I stir well so that the ice and water mixture reaches temperature equilibrium. The thermometer should read 32 degrees F. If it reads higher than 32 degree I stir the mixture a bit more just to make sure that I have reached temperature equilibrium. If it still measures higher than 32 degrees the thermometer is inaccurate. If the thermometer reads below 32 then the thermometer is inaccurate because water freezes at 32 degrees. If it was colder it would not be water, it would be ice.

ExpertVillage posted this video showing the process.

I am sure there are a lot of other uses for an ice bath in the boating world so please post a comment if you have one. If you liked the post please follow the blog by going to the upper right hand corner of the page and clicking the Follow button.

Boating Lessons Learned: Check the calibration of a thermometer using ice water.

Posted in Boat Tools, Live Aboard | Tagged , , , | Leave a comment

Boating Lessons Learned: Keeping the Beer Cold and Other Uses for Ice

BLUF: Ice can be used for more than keeping the beer cold.

One of my fondest memories is of all the cousins at Grandmother’s house on a hot summer afternoon making ice cream. It took three of us to operate the ice cream freezer; one would turn the crank; one would sit on top of the gear box to keep the contraption from turning over; and one would pour in the ice and rock salt as the mixture melted. The cousin who volunteer to sit on the freezer thought they had the best job until the cold got to be just too much for them. They got to take over cranking so they could warm up. LOL.

There were two concepts at work here. The salt dropped the temperature of the ice water mixture and spinning the ice cream can increased the convective heat transfer.

Over the years I have found other uses for an ice and salt mixture some of which are conventional like shrinking a bushing before pressing it into place for a tight interference fit and others being a bit less conventional like quickly chilling down a warm soft drink.

This video that I found on the web from DaveHax demonstrates how effective salted ice water is at chilling down a canned soft drink.  

Had the video demonstration included spinning the can similar to the spinning action of the ice cream freezer it would likely have taken less than 1 minute to chill that drink. Back in college I used to go over to my Dad’s chemistry lab and eat lunch with him. He used to keep a case of room temperature soft drinks in his office and he would quickly chill them by rolling the cans in an ice water bath … No salt added. The action was analogous to a lumberjack rolling a log with the can being the log and his fingers being the legs of the running lumberjack. The rolling action did not shake the contents to any significant degree but it significantly increased the convective heat transfer compared to a can sitting still in the ice water. The warm can rolled for a couple of minutes was chilled sufficiently to satisfy us. Just for grins I need to test what affect adding salt makes. But I have used this trick with straight ice and water many times since my college days and for more than soft drinks 🙂

I am sure there are a lot of other uses for an ice bath in the boating world so please post a comment if you have one. If you liked the post please follow the blog by going to the upper right hand corner of the page and clicking the Follow button.

Boating Lessons Learned: Ice has more uses than just keeping the beer cold.

This post is for informational purposes only. The content herein has a single theme: Mistakes …. or as I call them “Boating Lessons Learned”. While there may be elements of this site that appear to be advice about how to do some task you can be assured that it is not a complete and accurate “how to”. I am partially describing how I did something and what I learned. Do not rely on this information because Mcmanusboatworks.com makes no representations as to accuracy, completeness, correctness, suitability, or validity of any information on this site and is not liable for any errors, omissions, or delays in this information or any losses, injuries, or damages arising from its display or use. All information is provided on an as-is basis.

Posted in Boat Electrical | Tagged , , , , , , | Leave a comment

Boating Lessons Learned: Don’t Forget the Ground

Boating Lessons Learned:  Don’t Forget the Ground.

BLUF:   I often focus all my attention on the positive portion of a 12 volt DC circuit when I am troubleshooting and I neglect the ground portion of the circuit.

I was troubleshooting an intermittent 12 volt DC problem on Whacker’s boat the other day.  I love that old boat. You might call it “approachable”, kinda like Whacker was.

1961 Drifter, Steel Hull, Single 4 cyl Chevy.

1961 Drifter, Steel Hull, Single 4 cyl Chevy.

This ole boat has seen some river miles. Whacker took it down the Tenn-Tom all the way to Florida one time and spent a month at one of his favorite spots, The Flora-Bama.  Talk about one for the bucket list! If this place is unfamiliar to you then you should check out the link for some background and then check out their website. Seems like he made such an impression that they named a drink after him … “The Whacker”. If one of y’all find your way to the Flora-Bama let us know if it is still on the menu.

Anyway … Linda was interested in getting the boat back on the river again after many months sitting idle but the boat would not start.  The boat had a number of problems.  The batteries were always dead when she showed up at the boat so there was a short somewhere in the system.  Even with hot batteries the engine ignition system had an intermittent problem.  Sometimes the starter would engage and sometimes it would not.  Sometimes you could crank and crank on it and it would not start and other times it would bust right off.  Sometimes the engine would run fine for a few minutes and then just die like the ignition switch had been turn off.   Yeah!!!  A Puzzle.  I like working on boating puzzles … as long as they are not on my boat.  Note to Self:  A little introspection might be in order.

Right off the bat I found the purple ignition switch wire to the starter solenoid was broken almost in two.  It was hanging on by one strand of copper.  The battery is located in a tight spot right next to the engine and it looks like it may have been damaged when the battery was slid into place.  Too Easy!!!

Repaired Ignition Wire.  New blue Spade Connector

Repaired Ignition Wire. New blue Spade Connector

The engine cranked and Moose and I decide to celebrate our success with a little chill time.

Every Day is a Friday

Every Day is a Friday

But as the weekend approached I decided to crank the engine to satisfy my curiosity that I had indeed fixed the problem only to be rewarded with silence.  Hum?  “Too easy” was right.

So back to the basics.  I began by checking the voltage differential between the ignition coil input terminal and the engine battery negative terminal.  With the ignition switch on I measured a 12.6 voltage differential but when I checked a few moments later it was 3.6 volts. So I ran a jumper wire straight from the battery positive terminal to the ignition coil input terminal and the engine started right away. Looks like I am on the right track. The coil is not getting enough voltage to deliver a hot spark.  Spoiler alert … See where my thinking is limited? Getting enough voltage? What about returning the current back to the battery?

Long story short I spent the next hour or so tracing down the positive circuit from the battery through the ignition switch.  I did find a number of wiring issues along the way that I fixed such as cut off and abandoned hot wires that needed to be removed. It is too common on old boats for people to remove a piece of equipment and abandon the 12 volt circuit. I try to remove them when I find them. But I still had not found the root cause of low voltage to the coil.  Interestingly with the ignition switch off I measured a clean 12.6 volt differential between the switch and the nearest ground I could find but if I turn the switch on the voltage dropped into the 3.6 range.  Eventually I worked my way back to a 12 volt terminal strip located in the engine compartment area.  I checked the voltage differential between ignition circuit and the closest ground I could find which was the house battery and low and behold I measured 12.6 volts.  Hum?  How is it that I read 3.6 volts between the coil and the engine battery ground but I read 12.6 volts between the coil and the house battery ground?  Well it is an old boat.  Could it be that the grounds somehow are no longer interconnected?     So I connected the house and the engine battery grounds together and this established a good ground path for the ignition circuit.

Hum? Sounds like an around about way to establish an engine ground. Well the engine cranks fine now but I still wonder why connecting the engine ground to the battery ground was necessary to correct a bad ground within the engine circuitry. Maybe there is a high resistance in engine battery ground connection to the block? Maybe I will check that tonight.

Boating Lessons Learned:  Don’t Forget the Ground.

This post is for informational purposes only. The content herein has a single theme: Mistakes …. or as I call them “Boating Lessons Learned”. While there may be elements of this site that appear to be advice about how to do some task you can be assured that it is not a complete and accurate “how to”. I am partially describing how I did something and what I learned. Do not rely on this information because Mcmanusboatworks.com makes no representations as to accuracy, completeness, correctness, suitability, or validity of any information on this site and is not liable for any errors, omissions, or delays in this information or any losses, injuries, or damages arising from its display or use. All information is provided on an as-is basis.

Posted in Boat Electrical | Tagged , , , , , | Leave a comment